
I wasn’t sure how to make this post not sound like clickbait, because it really is the #1 biggest secret, dealbreaker and tool for success in my cooking. I’ve talked about this a little with the barbecue sauce, but it’s a technique deserves being explained in detail, particularly the way the salt is used.
At least 90% of my savory dishes start out the same way: onions go into the pan to get sauteed, followed by garlic. This is the foundation of nearly every savory flavor profile in my kitchen; the cooked onions and garlic give beautiful depth and create a base that hold the rest of the flavors together. This is nothing revolutionary- professional chefs and amateur home cooks saute garlic and onions all the time. But how you do it makes all the difference, and it’s something that even most professionals don’t do very well.
Onions are great raw (with all that sharpness and crunch), and they’re great fully cooked (with all that savory-sweet depth and richness), but they’re pretty gross in the in-between stage. Believe it or not, onions contain natural sugars. And when your onions have just been cooked for a couple minutes and are in that limp-and-translucent stage (which is the stage many recipes tell you to cook them to), those natural sugars haven’t had a chance to caramelize and develop into that rich, savory, smooth depth.
Onions also contain a lot of water, and that water both inhibits the caramelization of the sugars and keeps your onions really unpleasantly mushy.
Most people (including professionals) don’t cook their onions long enough to develop the sugars or sweat out all the excess water, and that’s simply because of the time it takes. And I get it, nobody wants to spend more than a couple minutes on something as mundane as cooking onions and garlic. But while it does take much longer to do it right, it doesn’t necessarily add to your total cook time because you can use that idle time between stirs to prep the rest of your ingredients.
Ingredients:
- onions (preferably yellow)
- salt
- olive oil
- garlic
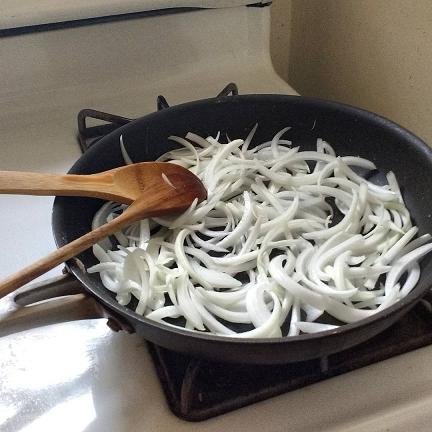
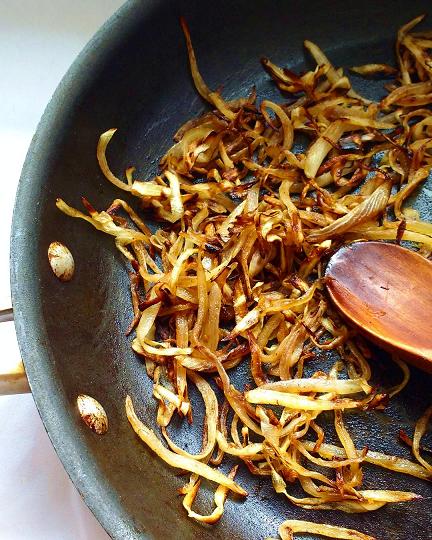
Step 1: Prep your onions. How many depends on your dish and your batch size, and how you cut them depends on what you’re making as well. Generally, you’re going to want to dice your onions in most cases, but if they’re going into a sauce or something that will get blended up, you can rough chop or slice them (as shown in the pictures below)
Step 2: Heat a pan on medium heat. Don’t add oil to the pan, just let it heat up.
Step 3: Once your pan is hot, add your onions and your salt. Do not add oil. I generally sprinkle in about 1/2 tsp of salt for one onion, but this is flexible. Because I use salt in cooking the onions, I generally don’t add any more salt later on in the recipe unless it tastes like it needs it. Stir thoroughly so that the salt coats the onions; this will draw that excess water out of the onions, which is crucial.
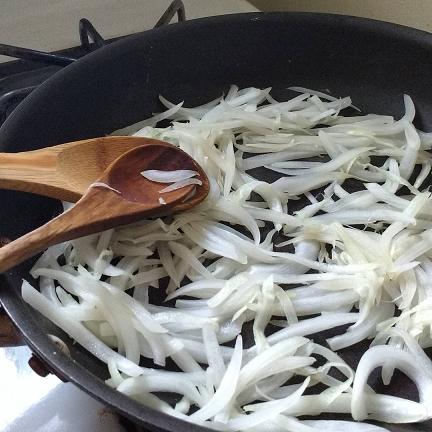
Stir occasionally, allowing the water to sweat out and evaporate.
Step 5: After the excess water has been sweated out and the onions are beginning to stick to the pan, stir in your oil (finally.) I generally add about a 3/4 teaspoon for one onion. You basically want to go as long as possible before adding the oil, because the oil coats the onions and forms a barrier that inhibits the water from sweating out.
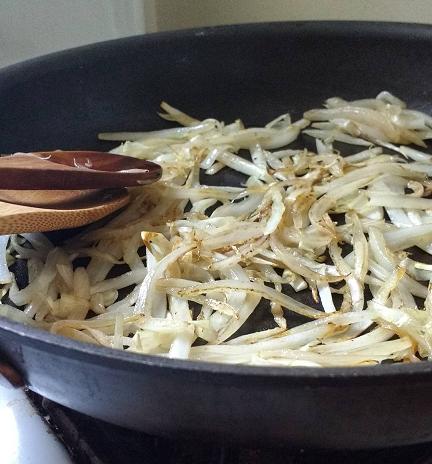
Stir occasionally as the onions continue to cook for a while
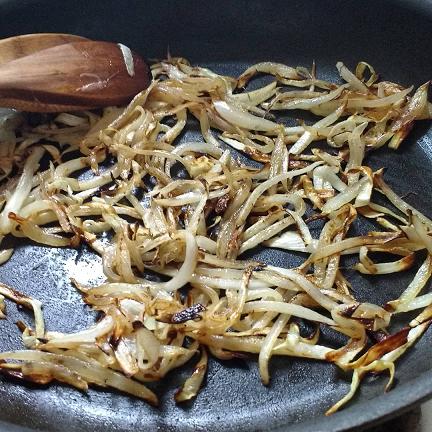
Keep stirring occasionally, keep letting them cook. If at any point you get a bunch of residue building up on your pan, you can de-glaze by moving the onions aside and pouring a little bit of water directly onto the residue. The water will release all those caramelized sugars from the pan and re-coat the onions with them, making them more delicious.
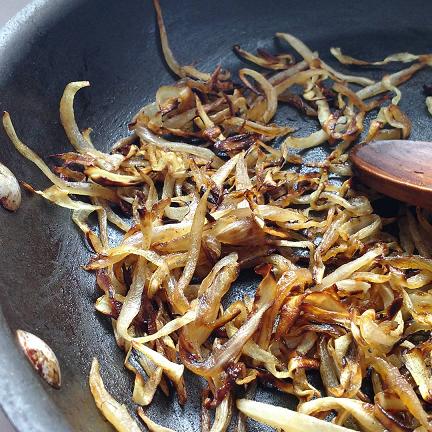
Step 6: Once they’re really deeply golden, you can either keep going and cook them until they’re a deep brown color or you can finally call it a day and add your minced garlic*. When your garlic goes in, make sure it cooks until it starts to turn golden-brown too. This won’t take nearly as long as your onions, but the half-cooked stage is gross for garlic too, so it’s important to make sure it’s also cooked fully.
*In terms of garlic, I highly highly highly recommend using the fresh stuff rather than the pre-minced stuff that comes in a jar with oil. (I call this “trash garlic” because it tastes like trash.) I know that mincing garlic is a pain, but there are a lot of other shortcuts that won’t ruin the flavor of your whole dish like trash garlic will. If you want to make it a little easier on yourself, you can usually get pre-peeled bulbs of fresh garlic in the store that taste fine. In my kitchen, I have a mini food processor that I got for cheap and use just for mincing garlic, ginger and jalapenos- it lives right next to my cutting board and saves me a ton of time.

Wow! This is so helpful! I feel stupid that I didn’t know this. I hated onions because of their slimy texture even though I liked the taste. Good to know they don’t have to be slimy and squishy. I’m going to try this sometime!
LikeLiked by 1 person
Don’t feel stupid at all, it’s no exaggeration that most professionals either don’t know this or don’t do take the time to do it!
LikeLike
This is a good technique for bringing out the umami from onions and garlic, which is particularly important in veggy cooking which often lacks it, but it should be noted that it will bring a very powerful flavor to the table. It’s amazing for earthy, hardy, sturdy food, but can be counterproductive when trying to maintain sharp, crisp flavors. I’ve found purposely not browning onions, and even adding garlic near the end of cooking can sometimes yield just as powerful a result, depending on what you’re making.
However, that is minutia from someone who specializes in a whole bunch of different ethnic cuisines. In general, and especially for a home cook, this advice is golden!
LikeLike
Right, that’s why I mentioned raw onion for sharper, crisper flavor profiles. I specialize in several global regional traditions as well and besides Vietnamese and Thai dishes, I haven’t found any in which halting the cooking of aromatics in the in-between stage is beneficial within vegan contexts.
LikeLike
This is life changing, thank you. I try to cook onions forever to caramelize but the salt trick is totally new to me!! When I’m not in the mood to wait forever I just omit them entirely. It drives me nuts when recipes say to add garlic and onion to the pan at the same time!!
LikeLike
how do you feel about not adding oil at all?
LikeLike
I definitely 100% recommend adding oil- the amount of difference is worth the extra calories. If you don’t add oil, you don’t have a nonpolar molecular substance to act as a barrier to keep the onions from burning as they continue to cook. Using water (or broth) doesn’t work because its molecules are polar, and the onions just get mushy again instead of really being able to cook to caramelization without burning. So this “steam-fry” technique really doesn’t yield good results.
LikeLiked by 1 person